
 Betuweroute en Kunst
 Kunst in huis? Netty Franssen maakt ook bijzonder mooie dingen
Get to the hard disk of an iMacThis is an iMac from 2008 |  |
If you want to replace the hard disk in your Intel iMac (as of 2008 ... until 2012), you have to open it up! Since you cannot see any screws from the outside, where are they?
Tweet

1. Preparation
Disconnect your iMac from everything and lay it flat on its screen on a soft surface. I used a bed :-D
Discharge and/or ground yourself by either touching the radiation system or something else and/or use a grounding wristband.
Remove the memory access door at the bottom of the iMac:
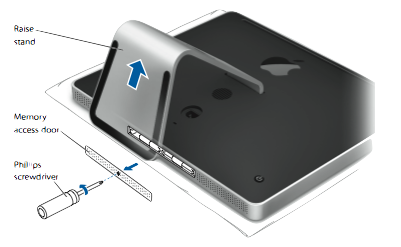
The memory access door is a bit bent - this is done on purpose so that when the screw is removed, the door comes out and you can take it out easily. Don't bend it straight!
2. Remove the glass cover
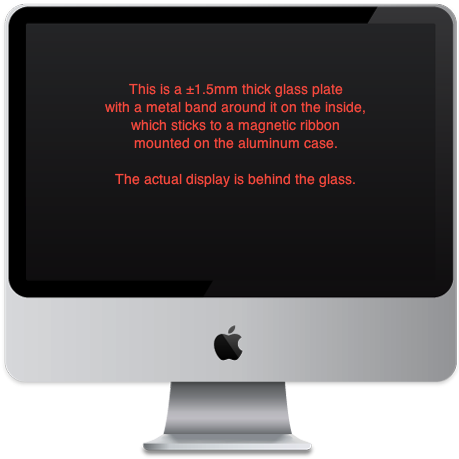
Turn the iMac around and lay it on its back. The glass plate glues to a magnetic border and additionally has some pins sticking out to keep the glass from sliding or falling off. These pins break off easily, so remove the plate very carefully.
You can lift the glass plate with two simple, soft suction cups, like these:
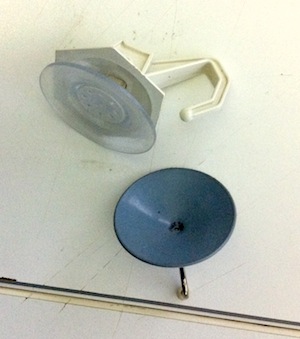
Stick them both on one side of the glass plate and pull up slowly. Not too strong, the magnetism will give way suddenly and you must have control over your muscles so the lifting of the glass remains a steady movement. When you have one side up, you can lift the whole plate off and put it aside. Now you see some screws!
3. Remove the iMac's aluminum case.
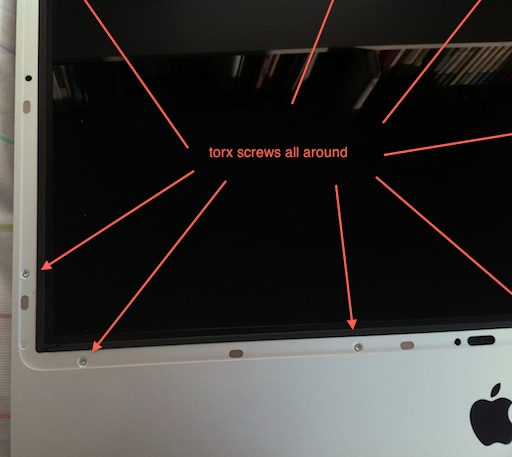
There are torx-screws all around the display. Some of them are of a different size and have to go back in exactly the same hole! I laid out all screws on the bed, around the iMac, in line with the holes they were removed from.
Now lift the case carefully at the top and slide the lifted case a bit to the bottom and lift it there too. Mind you: the iSight camera is connected to the frame and a cable connects it to the board. The cable can be disconnected by unplugging the cable. You can also keep the cable connected and rotate the case around the cable and lay it above the iMac.
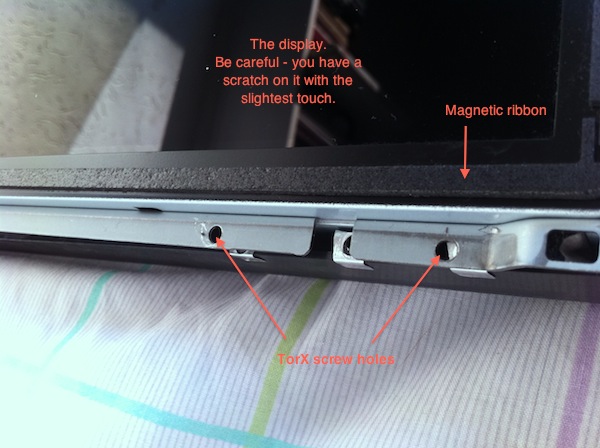
4. Remove the display
The hard disk is positioned behind the display. As you can see, the display has also torx-screws around it. I laid them beside the aluminum case screws, in the same order, so I knew where they had to go when I put it all back together.
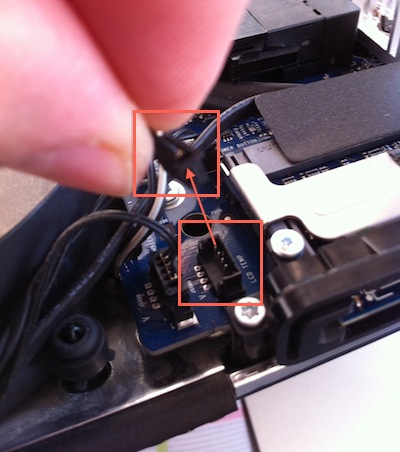
When all screws are removed, you have to disconnect two cables from the board.
The first one is located at the bottom left:
The second one is located at the right and is tightly screwed to the board:
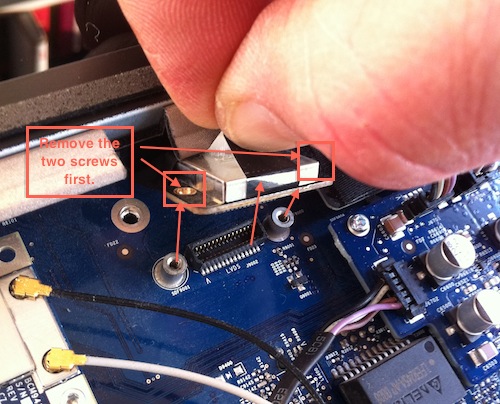
When the screws are removed, pull the connector loose by pulling the attached band upwards.
The display has a big cable attached to the board behind it and you do not really need to disconnect it. But you need room above the iMac to lay the display there.
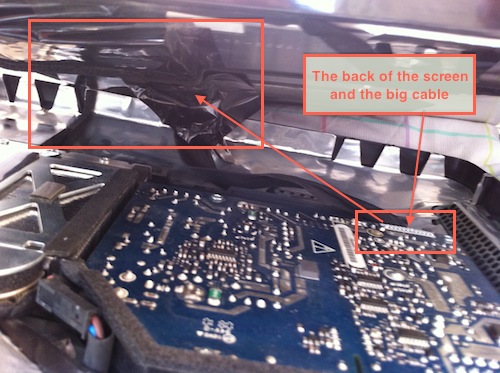
Now lift the display a few centimeters and turn it counter-clockwise around the connected cable at the back and lay it partly on the iMac so you do not accidentally disconnect this cable:

5. Get the hard disk in or out
The hard disk is a SATA disk and you find the connectors at the left. Disconnect them both. On top of the disk sits a sensor, which you pull out from a small in-place-holder.
Then remove the hard disk by pulling the black lever at the top side of the hard disk:
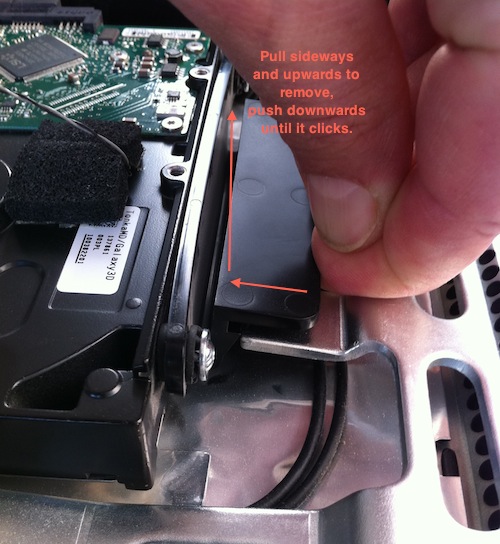
At the bottom side the disk slides into two little stands and when removing the disk, pull the disk out of these stands after you loosened the top handle.
6. Transfer data to another disk
Since the disk has these two pins and a lever attached, it cannot be put in these desktop docking stations that are common nowadays. What you can use, is a SATA connector from Newer Technology, for example (there are others out there), to connect the disk to another Mac.
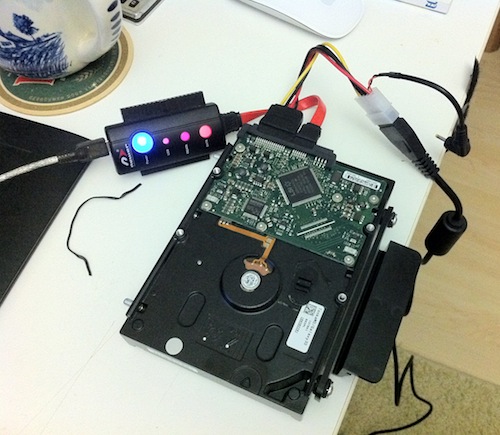
I used Carbon Copy Cloner to clone the disk onto my new iMac and with the disk out, I could send the iMac in for repairs without risking any loss of data.